10 Solutions for Air Leak Repair

10 Solutions for Air Leak Repair

  • Cooling
air leak repair

You wouldn’t run the heat in the house with the windows open in the winter, would you? Of course not! Unfortunately, when you have multiple air leaks in the house, this is the exact effect happening within your home. The warm, expensive indoor air is permitted to escape the house, while chilly, winter outdoor air is allowed into the home. These air leaks can be found in many areas of the home. The attic, windows, doors, and basement are prime places for the average homeowner to lose warm air to the outdoors. You need air leak repair and you need it fast. 

]If the weather in your area is beginning to get a little chilly, you may want to begin some yearly maintenance tasks to keep the cold air out of your home. If the warm air leaks outdoors, your heating unit will have to work overtime to try to keep the house comfortable. This means more wear and tear on your unit, and possibly costly repairs in the future. Additionally, you will feel chillier in the house and your heating bills will skyrocket if too much cold air is able to penetrate your home. Most of the following ten repairs are fairly inexpensive and simple to do, requiring little more than a screwdriver, a few easily found items, and a sharp pair of eyes. If you can’t afford the big tasks, like new windows or a complete insulation replacement in the attic, do what you can in other areas of the house. Tackle a few of these jobs each weekend, and you’ll be surprised at how much cozier your home is this winter.

1. Caulk and weatherstrip doors and windows that leak air.

You know what it’s like to stand in front of the door with cold air blowing on your toes from the crack under the door. Seal those door jambs and thresholds with weatherstripping. Also, pass your hand around the window frames and door frames. If you feel cool air, caulk the cracks to keep out the air

2. Install foam gaskets behind outlets and switch plates on the wall.

This is super easy to do, but it does take a little bit of time.  For just a few dollars, you can buy a large packet of foam gaskets to insulate behind your light switches and electrical outlets. Simply remove the center screw that holds in the faceplate, place the foam gasket in place, and replace the faceplate and screw. 

3. Install foam sealants on larger gaps on windows.

If you have larger cracks and gaps in the framing around your windows and doors, you may be better off using expanding foam to seal them up. Use this stuff carefully and always wear gloves while applying it.

4. Inspect insulation for mold and leaks.

When checking out the neglected corners of your house for air leaks, pay attention to the status of your insulation. If you have moldy insulation, you should replace it. Mold can make people very sick, and it’s an indication of dampness that can lead to rotten wood. Make sure there are no gaps or leaks in your insulation .

5. Cover or replace single-pane windows. If you seek replacement, install efficient double-pane windows instead.

While it can be expensive to replace the windows in your home, installing efficient double paned windows can save you big money over the years and keep your home more comfortable. The air space between double paned windows serves as insulation to allow light in, but keep cold air outside. If you can’t afford new windows at this time, using a window insulation kit or heavy insulated drapes can help keep winter drafts at bay.

6. Cover the kitchen exhaust fan when you are not using it.

The kitchen exhaust is like a huge chimney and can vent your indoor air if you don’t pay attention to it. You can cover this opening with a dishtowel using Velcro type attachments. However, it is very important to not forget to remove it before you turn on the fan. Also, don’t make the mistake of shoving an old rag in the opening. If someone doesn’t know about it or forgets to remove it before turning on the fan, the rag can be sucked up into the exhaust fan, completely ruining the appliance.

7. Seal air leaks around furnaces, chimneys, or water heater vents with fire resistant materials.

Be sure that when you insulate and seal around potential fire hazards that you use fire retardant materials. Places like chimneys, furnaces, and hot water heater vents can get very hot. Flammable materials could ignite in these places.

8. Check your dryer vent for any blockage.

While you’re checking around the dryer vent, you may want to make a quick inspection of the dryer vent. If the dryer vent is blocked this is a fire risk.. Also, your dryer will be very inefficient without maximum airflow.

9. Check attics, basements, and crawl spaces for air leaks before the winter begins.

Look around in the frequently overlooked areas of the home for cold air leaks. Attics, basements, and crawl spaces can be places where cool air can enter the home. Close the vents to crawl spaces to keep cool air out. Shine a flashlight in dim corners to ensure that rodents or other critters haven’t chewed holes in unexpected places. Seal up cracks with putty or caulk, and make sure the insulation in the attic hasn’t been disturbed.

10. Seal air leaks around any plumbing or electrical fixtures coming from the walls, floor, and ceiling. 

Any time an electrical or plumbing fixture enters the house, there’s a chance that the opening through the wall isn’t sealed well. Double check these areas, and use foam insulation or caulk to close up holes where cold air can invade. Look behind toilets, under sinks, where the refrigerator water line enters the house, and where the dryer vent exhausts to the outdoors.

For More Information on Air Leak Repair, Call NSHEC Today!

Contact North Shore Home Energy Today for the Best in HVAC Work!

Check Out Our Current Specials!

Read The Great Things That Your Neighbors Are Saying About NSHEC.

By nshec

A Comprehensive Guide to Duct Cleaning

A Comprehensive Guide to Duct Cleaning

  • Cooling
  • Heating
duct cleaning

Does your home have an HVAC system? Then it’s important to perform regular duct cleaning to ensure the air flow into your home is as clean as possible. The system’s vents will get dusty over time, since dust particles are naturally drawn into the duct along with the air. By cleaning them thoroughly, you can reduce the amount of unwanted particulate in your household’s airflow. In addition, by keeping your air ducts clean, your HVAC system will be more energy-efficient, which will prevent your energy bills from rising. 

How to clean your air ducts yourself

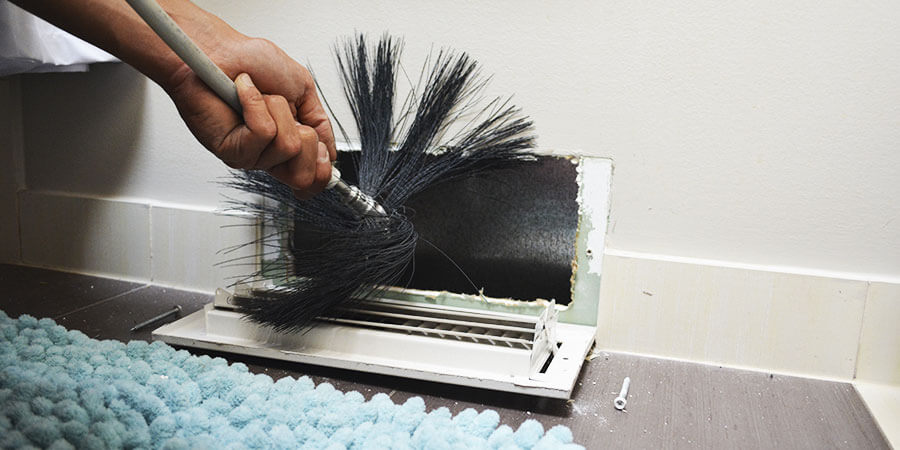
Fortunately, you can do routine duct cleaning yourself. You’ll need a Phillips screwdriver; household cleaner; a cloth; warm, soapy water (optional); microfiber cleaning cloths; and a vacuum cleaner (preferably one with a HEPA filter) with a dust brush. You’ll also need protective eyeglasses, a face mask, and sturdy rubber gloves.

  • Turn off your HVAC system. Before starting, turn off your HVAC system. The last thing you want is for air to be blowing onto you while you’re trying to remove dust and debris from the vent. 
  • Remove the vent cover. Wall vent covers need to be unscrewed. Do this carefully to avoid damaging the wall. Some floor vents can simply be lifted up, while others also need to be unscrewed. 
  • Clean the vent cover. There’s likely dust caught in the vent cover; plus, it will feel greasy to the touch. You can clean it with a regular household cleaner and a cloth, or you can wash it in warm water and dish detergent. Always make sure to dry it carefully. 
  • If you have vent register filters, clean them. Some vents have filters installed to catch pet hairs or other things. If your vents have filters, remove the debris that’s built up, and clean them.
  • Vacuum the inside of the vent. Attach the dust brush to the vacuum cleaner and reach as far as you can inside the vent. Vacuum up all visible dust and debris.
  • Wipe the inside of the vent. Using a microfiber cleaning cloth and the household cleaner, wipe the inside of the vent as far as you can reach. 
  • Re-attach the vent cover. Carefully replace the vent cover. If it’s attached with screws, make sure they’re firmly screwed in place. 
  • Clean your HVAC system’s filter. To get the best performance from your HVAC and ensure the best indoor air quality, clean or replace your HVAC’s filter when you’ve finished cleaning your vents. 

Note that if you find any signs of mold infestations, pests, or damage to the inside of the ducts, you’re best advised to call your HVAC expert right away as these are issues you shouldn’t address yourself. 

Why you should still schedule professional duct cleaning

Keep in mind that it’s always a good idea to schedule professional duct cleaning and maintenance at least once a year. That way, your HVAC specialist can remove all dust and debris you might not be able to reach and at the same time, repair any damage that might be causing air leaks. And in the long run, whatever time, effort, and money you spend on duct cleaning is an investment in better indoor air quality—and that’s better for your and your family’s health. 

For More Information on Generator Accessories, Call NSHEC Today!

Contact North Shore Home Energy Today for the Best in Electrical Work!

Check Out Our Current Specials!

Read The Great Things That Your Neighbors Are Saying About NSHEC.
By nshec

What You Need to Know About Electrical Code Compliance

What You Need to Know About Electrical Code Compliance

  • Electrical
  • Miscellaneous
electrical code

If you’re upgrading your home’s electrical system or about to start a remodeling project, then it’s important to be aware of electrical code compliance requirements. Electrical codes are specifically designed to set a safety standard that minimizes the chances of injuries and property damage due to electrical shock, faults, or fires. In other words: While complying with electrical codes might seem like a hassle, it’s an investment in your and your family’s safety.

Of course, due to increased household power consumption and technological advancements, homes today have to meet a different set of requirements than homes that were built 20, 30, or 40 years ago. And although you won’t be required to upgrade your home’s old wiring just because it’s old, it’s a good idea to do it because it’s much, much safer. 

Once you start working on your home’s electrical system, it’s good to have a general overview of all applicable requirements. The following brief overview will provide you with a basic understanding of electrical code compliance. 

National and local codes

  • National codes: The National Electrical Code (NEC) describes all national codes for both commercial and residential wiring. 
  • Local codes: In addition to the NEC, there are also local codes that are determined by local building departments. Note that local codes can vary significantly between different municipalities.

General code requirements

  • Circuits: Existing circuits cannot be overloaded by the addition of a new service. Residential buildings generally have 120 volt circuits at 15 amps, with kitchen and utility areas having 20 amps. 
  • Wires: 15 amp circuits require 14-gauge wire, and 20 amp circuits require 12-gauge wire. 
  • Service panels: Service panels usually don’t require upgrading unless you’re adding a new circuit.
  • Cable: Non-metallic cable can generally be used unless the cable will be exposed, in which case conduit or armored cable will probably be needed. 
  • Fixtures, appliances, and receptacles: All fixtures, appliances, receptacles, and switches must be safely grounded. 
  • Boxes: Most municipalities allow plastic boxes, although there are some local codes that require metal boxes. 

Additional code requirements

In addition, there are also highly detailed electrical code requirements for each room in the home, as well as the home’s exterior. For example, pull chains for light activation are not allowed in many rooms including the bedroom, living room, and dining room. A kitchen with several appliances such as a dishwasher, garbage disposal, stove, refrigerator, and microwave may require those appliances to be on their own individual circuits. In the bathroom, all receptacles must be GFCI-protected and light fixtures must be moisture-proof. Exterior electrical receptacles and lighting must all have waterproof covers and fittings, and cable may not be exposed.

It should be clear that ensuring compliance with national and local electrical codes is both complicated and necessary. That’s why it’s always best to hire a qualified local electrician in the event your electrical system needs upgrading or expanding. He or she will be able to advise you on your best options and make sure that all the work that’s done is up to code. 

For More Information on All Things Electrical, Call NSHEC Today!

Contact North Shore Home Energy Today for the Best in Electrical Work!

Check Out Our Current Specials!

Read The Great Things That Your Neighbors Are Saying About NSHEC.

gfci installation gfci installation

By nshec

Accessories to Consider for Your Automatic Backup Generator

Accessories to Consider for Your Automatic Backup Generator

  • Generators
  • Miscellaneous
generator accessories

Whether you’re in the shop for a new automatic backup generator or you’re a seasoned owner of a reliable, considering a few helpful accessories can save you from potential headache later down the line. Accessories that you’ll locate online will range from pure-maintenance use to pure-aesthetic purpose, so figuring out exactly what you desire/ are looking for in an accessory can be totally subjective to the buyer. We’ve laid out the most common accessories, dabbling in both the aesthetic and the practical, to try and help you pinpoint exactly what you may want to consider tacking on to your automatic standby generator purchase or grabbing to help your already-installed backup generator.

Extra Oil Filters

Clean oil is a crucial element to any well-maintained automatic generator. As time rolls on, your current filter will begin to dirty due to a variety of reasons that could honestly make up their own separate article. A dirty filter means bad news for your engine. At first the filter will be less and less effective at separating different contaminates from your engine that make their way into your oil. This can cause damage to the engine over a long period of time. When the filter gets dirty enough, it will become clogged and limit the oil that can get to your engine when it needs it. This can do serious damage to your backup generator and warrant extra cost for repair. 

Extra Air Filters

If it hasn’t become clear yet, the engine coupled in a backup generator is maintained very similarly to an automotive engine. You’ll see many of the same terms mentioned regarding both. When an air filter is blocked with contaminants, airflow and clean oxygen intake is decreased significantly. Without clean oxygen to mix with the fuel, your engine cannot use the gas you provide it as efficiently as it would like, and the engine begins to experience a significant amount of stress. This stress, over time, can cause unbeknownst damage to your generator. Having an extra air filter on hand means that you will be able to stay on top of generator maintenance instead of being purely reactive to issues when they come up.

Fascia

These are purchased for more aesthetic reasons than any, but also provide some practicality. Purchasing some fascia that fits together around your unit will give it a sleeker, smoother look than the clunky, box-like look it most likely has now. This will allow your generator to look a lot more natural sitting in your yard with the rest of your landscape. For anyone, including small children, running around in your yard, fascia can prevent them from getting any nasty scrapes or wounds while passing by the corners of the generator during play.

Touch Up Paint

Despite how it may sound, touch up paint is in fact not used for aesthetic purposes. As much as we’d love to tell you that you can spray paint your generator that neon-green you’ve always wanted, touch up paint is actually used to prevent future corrosion on your generator. You simply spray it on current scratches and other signs of wear and tear on your generator, and the spray will prevent any corrosion from building up in those spots. This can be particularly useful for seasoned generator owners who haven’t checked for corrosion in their generator yet, and need a quick way to stop it from growing or prevent any more from happening.

Maintenance Kits

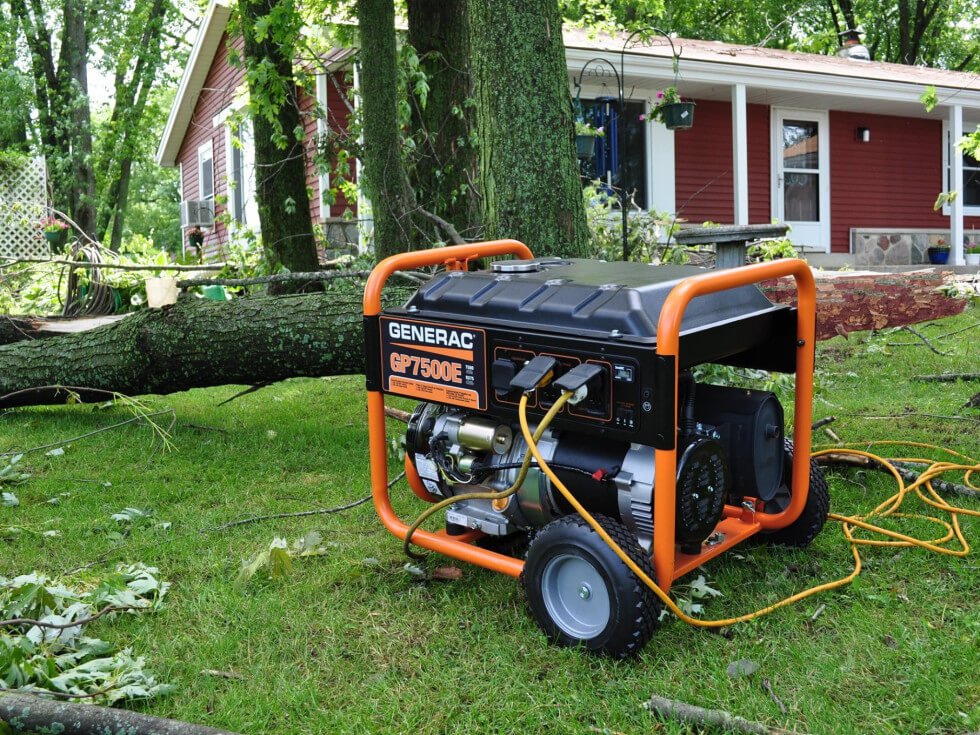
For any standby generator, and to a much larger extent any engine in general, routine maintenance is a must. The consensus for maintenance on a standby automatic generator is at least once a year. Exposure to the outer elements, dust, or even salty air can cause long-term issues with your generator if not maintained properly. Luckily, many generator suppliers, including Generac, offer maintenance kits that make your generator upkeep as easy as possible.

Most commonly a maintenance kit will include:

  •         Fresh oil that is compatible with your generator
  •         A new oil filter to replace the old one in your system
  •         A new air filter to replace the old one as well
  •         A pre-cleaner
  •         An oil funnel
  •         New spark plugs
  •         Chamois
  •         A reminder sticker

All of these items are essential for that yearly tune-up that your generator requires. Kits are priced around the $50-$100 range depending on the make and model of your generator as well as the contents of the kit.

Cold Weather Kits

If the temperature surrounding your generator regularly dips below 32 degrees Fahrenheit, it may be in your best interest to consider a cold weather kit. Colder climates can affect everything in your generator from the oil itself to the battery. The longevity of your generator, as well as the efficiency at which it runs is put at serious risk in cold temperatures.

Most cold weather kits include:

  •         Fresh oil
  •         An automatic battery warmer
  •         A crankcase oil heater
  •         An automatic thermostat that functions in tandem with the crankcase and battery warmer

In cold/sub-zero temperatures your battery longevity is reduced and your oil becomes more Jello-like than smooth liquid. Getting the warmers attached to your generator will help prevent these detriments while keeping your generator healthy and functioning. All of these accessories can be found at most generator providers’ websites, including Generac’s!

For More Information on Generator Accessories, Call NSHEC Today!

Contact North Shore Home Energy Today for the Best in Electrical Work!

Check Out Our Current Specials!

Read The Great Things That Your Neighbors Are Saying About NSHEC.
By nshec

7 Factors to Consider Before a GFCI Installation

7 Factors to Consider Before a GFCI Installation

  • Electrical
  • Miscellaneous
gfci installation

Many people don’t understand how electric circuits work, and the equipment used to protect your family from an electric shock or fire. This is done through a ground fault circuit interrupter (GFCI), which is one of the most important pieces of equipment in a home that can save your life. For any areas that have both water and electricity, a GFCI is a must, and is required by law according to the National Electric Code (NEC).

What does a GFCI do?

A GFCI detects any irregular current flows and shuts off the power before things become serious. Without a GFCI, there is a heightened risk, putting you and your family at risk. Without a GFCI in place, property values are lowered due to the high risk of electrical issues being present. There are three main advantages to having GFCI outlets:

  • Preventing Shock

GFCI outlets prevent electrocution and shock. The built-in sensor monitors the change in electric flow and will shut down when there is a problem. Although a little more expensive than standard outlets, it is well worth the cost.

  • Preventing Fire

GFCI outlets detect ground faults. This aids in preventing electrical fires. Coupled with the assistance of electrical fuses, the likelihood of an electrical fire occurring is very slim.

  • Prevention of Appliance Damage

As time passes, there are instances where electric currents can damage certain appliances within home. This is one reason why computer hard disk drives fail or shut down. When using a GFCI, when leaks are detected, the circuit will shut down. This helps protect your appliances and equipment from being damaged.

What is the difference between a GFCI and a circuit breaker?

Circuit breakers are designed to protect an electrical circuit from damage caused by overload or short circuiting. It can be reset automatically or manually to continue operation. They are designed in a number of sizes – consider it a mechanical fuse. A GFCI senses a leak in the circuit, usually before the circuit break. Although both interrupt electrical shortages, the GFCI is more sensitive, identifying other places that have water usage.

Where should you install a GFCI?

Before installing a GFCI, it is best to know where it should be placed. Because GFCIs detect electrical currents near water, it should be installed in an area that is subject to moisture. This includes bathrooms, kitchens, laundry rooms, garages, and other places where moisture can collect.

How do you test a GFCI?

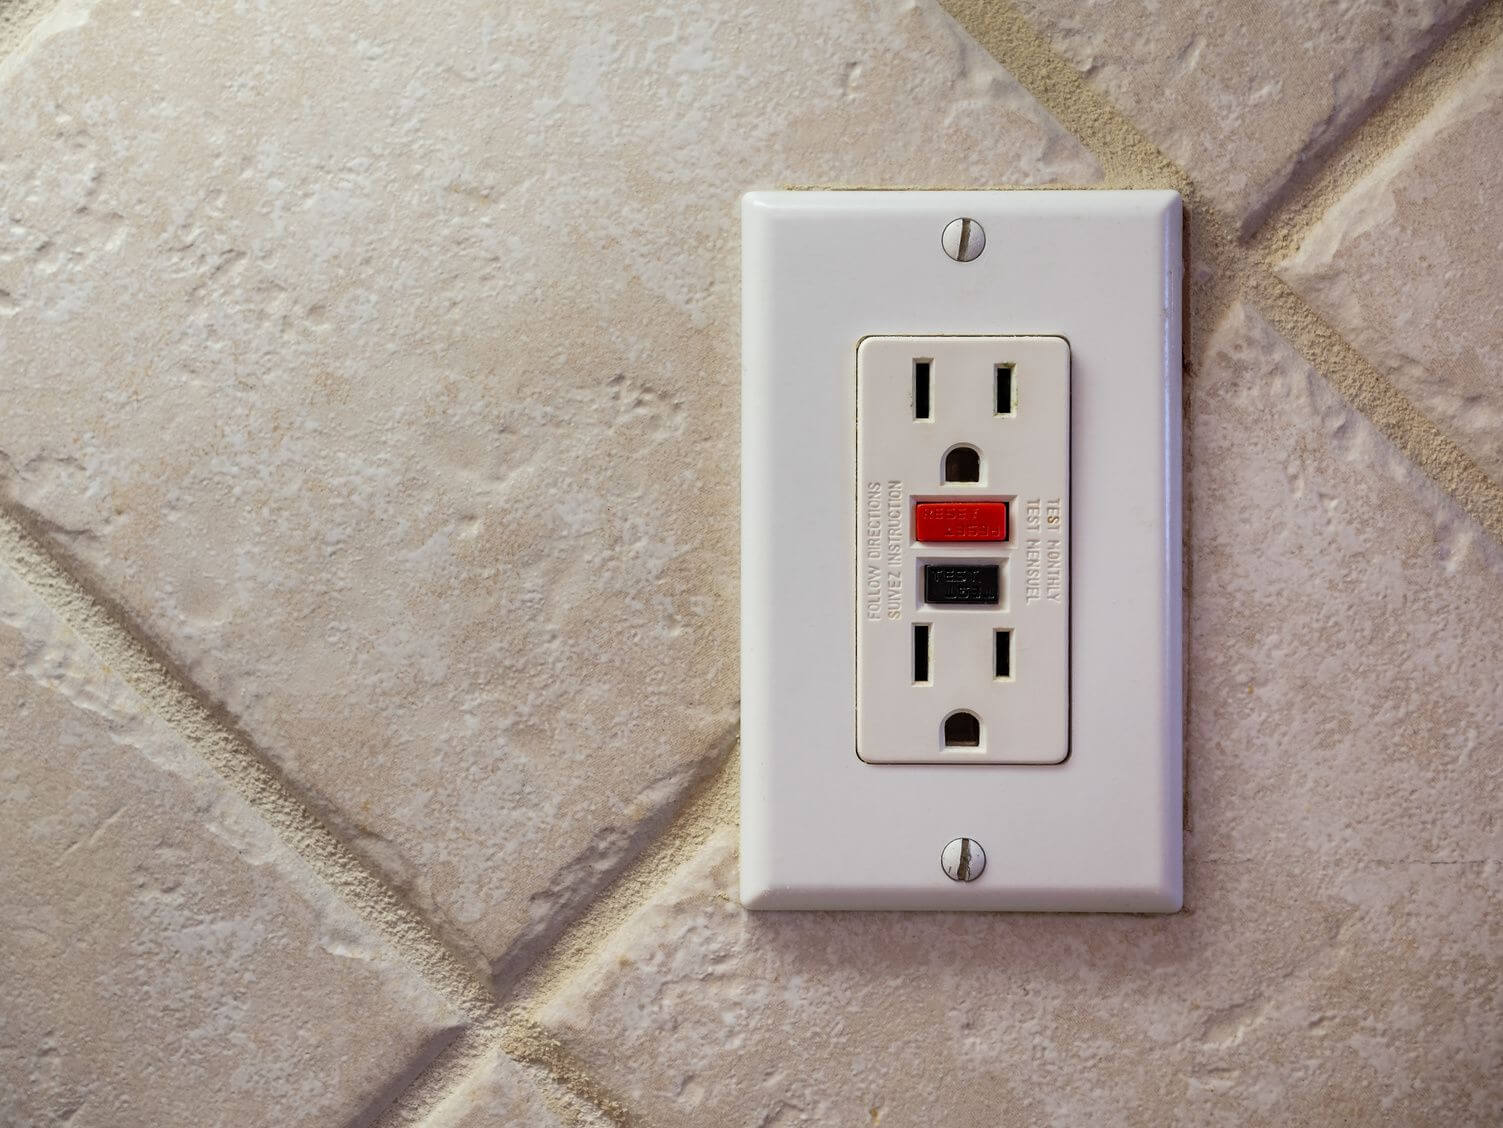
If you have a GFCI that was installed prior to 2006, you need to test it with a circuit tester. You plug it into the outlet and push the test button. If the power goes off, the GFCI is still working. Pressing the reset button will restore power. If the power does not go off, that means the GFCI is no longer working. Newer GFCIs give you an automatic warning when they are no longer working, and the power will shut off on its own. This indicates it needs to be replaced.

How does a GFCI differ from an AFCI?

An Arc-Fault Circuit Interrupter (AFCI) outlet is designed to recognize arc faults, which are in the wiring. A GFCI protects people from electric shock. Faulty wiring in arc-faults can be a result of humidity or heat, extended mechanical or voltage stress, or age. When wires become damaged by nails or other punctures, animal bites, or bent wires that cause cord damage, this can result in arc-faults.

How do you use a temporary GFCI?

A temporary GFCI is used to provide electricity for areas that need temporary use. This is done by installing a GFCI breaker that should be tested on a weekly basis to ensure there are no hazards that could cause electric shock or fire. There are certain rules to follow for temporary installation, and additional guidelines to be followed for installation removal.

When can you use temporary GFCIs?

You can use temporary GFCIs when you have certain activities going on that require electricity, but can be removed after completion of the purpose. This includes remodeling, demolition of buildings, developmental work, emergencies, tests, decorative lighting for events, and other instances where temporary electrical power is needed. Temporary GFCI installation has time limits on the amount of time it can be used, based on the use. Portable GFCI devices are also widely used on job sites, for portable generators, vending machines and more.

Knowing these seven factors on how and why GFCIs are important can provide peace of mind, knowing the risk has been lessened and will keep your family comfortable and safe. Now you are aware of what is required, whether installing yourself or using a contractor. This will assist in making sure your home is protected the right way.

For More Information on All Things GFCI Installation, Call NSHEC Today!

Contact North Shore Home Energy Today for the Best in Electrical Work!

Check Out Our Current Specials!

Read The Great Things That Your Neighbors Are Saying About NSHEC.
gfci installation gfci installation

By nshec

10 Common Causes for Furnace Electrical Failure

10 Common Causes for Furnace Electrical Failure

  • Heating
  • Miscellaneous
furnace electrical failure

Your heating system broke down in the middle of the coldest night of the season. Oh no! Before you call a professional for furnace repair, you need to know what caused your system trouble to begin with. If it’s a result of bad electrical connections, you definitely need to know what went wrong, even it just comes down to a blown fuse. The clock is ticking, and the weather isn’t getting any warmer.

Here, we’ll explain what kinds of electrical problems can sink your furnace’s performance so you can call for help before you’re left without heat at all.

The Importance of Furnace Maintenance

Your furnace has a big job. It’s tasked with keeping your family warm and comfortable during the winter months. With proper maintenance, your furnace will continue to heat your home efficiently for many years to come, helping you save money on utility bills while providing a steady flow of heat throughout your home. If left unattended to, however, your furnace could leave you facing costly repair or replacement bills. Improperly maintained furnaces often have shorter life spans and increased safety hazards. Not to mention, they can leave homeowners without heat when they need it most.

10 Common Causes of Furnace Failure

Wondering what leads to furnace electrical failure? The following are 10 common problems incurred by improperly maintained furnaces:

  1. Clogged filter. Dirty or clogged filters reduce airflow, which ultimately forces the furnace to work harder to circulate air. Clogged filters can also damage the limit switch, which is responsible for controlling the fan. Be sure to clean your filters regularly, or simply swap them out for new ones.
  2. Loose wiring. When your furnace is running, it causes a certain amount of vibrations. Over time, these vibrations can cause internal wiring to become loose, which can eventually lead to an electrical short. A single loose wire can be difficult to find, so it’s best to have regular tune-ups to ensure your wiring stays tightly connected.
  3. Incorrect fuses. It’s essential to equip your furnace with fuses large enough to handle the capacity of your heating system. If a fuse is too small, it will almost assuredly result in electrical problems.
  4. Dirty fuses. Dirt and soot are normal parts of your furnace’s daily life, but it’s important not to let these elements build up. Excessive grime can impede your fuses from being able to connect to the electrical components. To ensure sustained connectivity, be sure to keep your fuses cleaned as part of regular, ongoing maintenance.
  5. Exposure to water. Water and electricity don’t mix. If your furnace is tucked away in a damp place or located near any water leaks, an electrical failure is likely in your future. Seal any leaks to remove excessive moisture that could cause your furnace’s electrical system to fail.
  6. Transformer failure.  Transformers are responsible for converting energy into the correct voltage necessary to run your furnace’s controls, ignition, and timer. If your transformer isn’t functioning properly, it won’t support your home’s electrical system correctly. If you’re unsure about your transformer’s capacity, it’s best to contact an HVAC professional as soon as possible.
  7. Faulty starting capacitor. The capacitor is to your furnace as the starter is to your car. It’s necessary to get the system started. If your capacitor is on the fritz, it may cause intermittent electrical problems. Faulty capacitors can be replaced fairly inexpensively, which should solve the problem.
  8. Faulty blower motor. Motors require a good amount of energy. If your blower motor is failing, it will put additional strain on your power source, eventually leading to an electrical short. A faulty blower motor should be replaced by an HVAC expert.
  9. Failed valves. Natural gas or propane furnaces are equipped with valves that regulate gas pressure. If a valve is malfunctioning and unable to open and close properly, the pressure regulators will not work properly. This can cause the malfunctioning valve to heat up, resulting in an electrical short and a blown fuse.
  10. Thermostat control wiring problems. There are plenty of wires surrounding your furnace, and if someone isn’t careful, he or she could inadvertently move or disconnect the wires that interact with your thermostat. The control board of your furnace has a separate fuse that keeps it from getting too hot. Beyond the surface lies your furnace’s wire frame, which can easily be the culprit for blown fuses and short circuits, particularly if someone erroneously found their way to this thermostat control system and relocated some of the wiring.

When it comes to your home heating system, it’s always better to be proactive, rather than reactive. Furnace electrical failure can leave you out in the cold when you need heat the most. To ensure your heating system stays healthy and happy, schedule regular furnace tune-ups with HVAC professionals.

For More Information on All Things Heating Maintenance, Call NSHEC Today!

Contact North Shore Home Energy Today for the Best in Heating Maintenance!

Check Out Our Current Specials!

Read The Great Things That Your Neighbors Are Saying About NSHEC.

By nshec